A guide to importing lights into Lumion

Lighting made simple
Getting the lighting right in your design can elevate it from good to unforgettable. Light shapes how textures come to life, how shadows interact with surfaces, and ultimately, how people experience your work. Setting up this essential detail from the start goes a long way in saving you time and simplifying the process.
With Lumion’s import lights feature, you can place accurate lighting directly in your CAD or 3D model and bring it seamlessly into Lumion. Your lights stay linked to the model, keeping your workflow smooth, precise, and efficient. This way, you can design and render confidently, knowing every light aligns with your vision from start to finish.
In this guide, we’ll walk you through each step to master this feature. Let’s get started and make your next project shine.
Import and adjust
Once you’ve set up the lights in your model, bringing them into Lumion is a breeze. Just import your model as usual, select the correct file, and you’ll see an option to import the lights. Toggle it on, hit OK, and your spotlights and omni lights will appear in your Lumion scene just as they did in your CAD software.
Currently, supported file formats include FBX, Collada, glTF, and DWG. Make sure to check if your CAD software supports exporting lights to one of these formats.
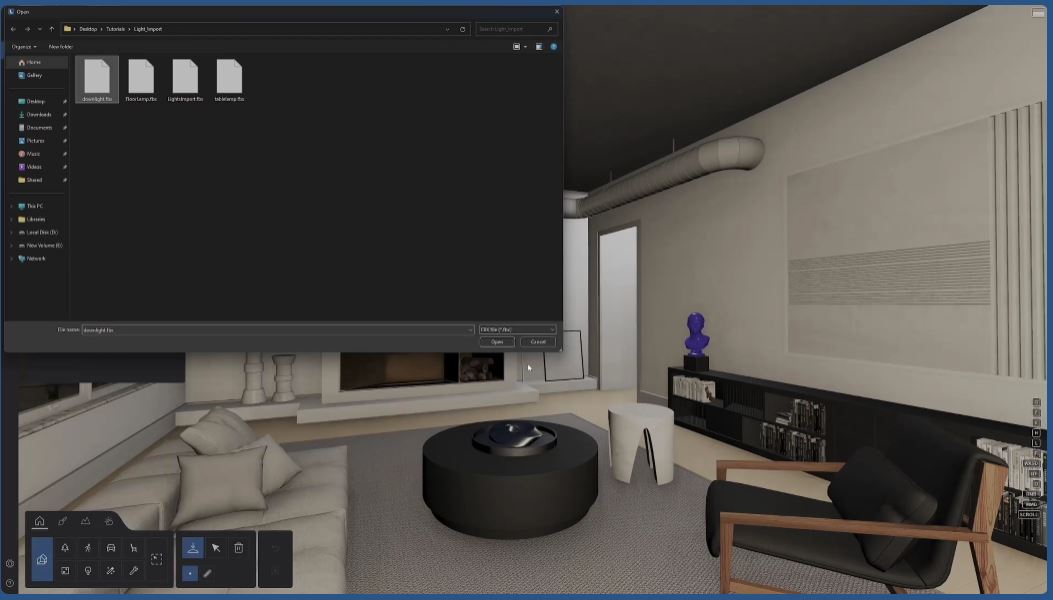
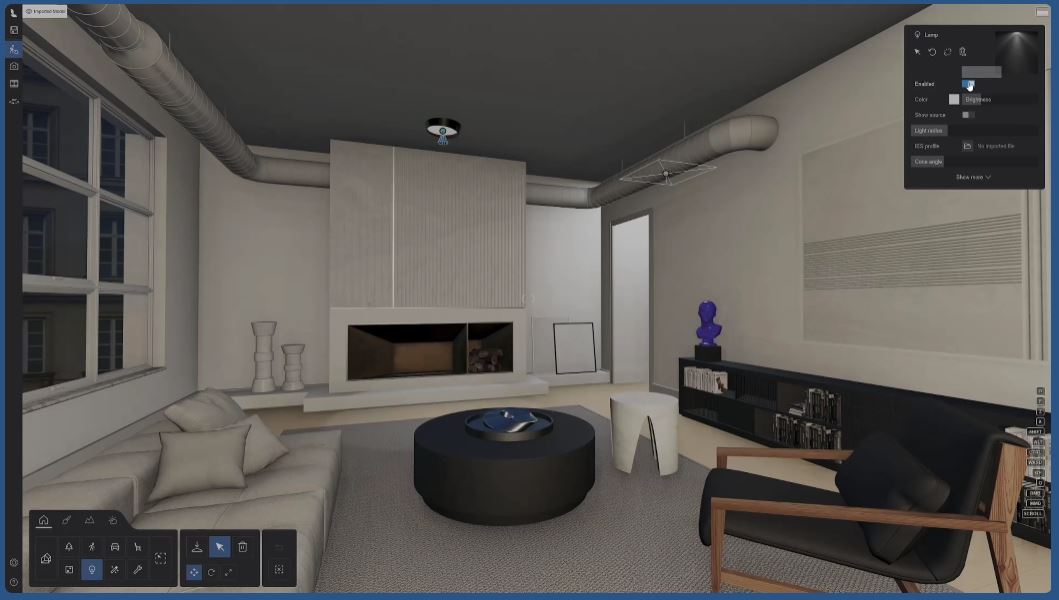
In this example, we have an FBX file containing a model and lights. The lights’ brightness, color profile, and cone angle will automatically be imported too, but these properties can be adjusted in Lumion if they’re not quite right. Any tweaks you make to these will be applied to all of your imported lights.

If you change your mind, you can always restore the original settings they were imported with by selecting the imported model and clicking Restore all lights to imported settings.

Move and remove
As the lights are linked to your model, they’ll follow your model wherever you move it. If you delete the model, your lights will be deleted as well.
Any changes you wish to make to the position of your imported lights, such as moving or rotating them, will need to be done in your CAD software.
And while you can’t delete individual imported lights, you can disable them in the object properties panel or detach them in the context menu.
If you want to restore deleted lights, hold down the CTRL key while clicking the Restore option.
Replicate real-world lighting
Along with spotlight and omni lights, you can also import IES profiles straight from your CAD software. This is currently only available for DWG files imported from AutoCAD and BricsCAD – but watch this space.
IES (short for Illuminating Engineering Society) profiles help you recreate realistic lighting in your renders by simulating how light is emitted from real-world fixtures. Applying this industry standard to your light sources means they’ll automatically mimic the intensity, spread, angle, and other characteristics of their real-world counterparts.
Importing IES profiles into Lumion helps streamline the design process and maintain consistency between model and render.

Keen to get started?
It’s time to import some lights of your own! If you’re not already subscribed to Lumion, there’s an easy way to test it out. Take out a free 14-day trial today and you can enjoy the latest version of Lumion Pro – no credit card required.

