How to use the photo match effect in 3 steps
Seamlessly blend your design with real-world environments
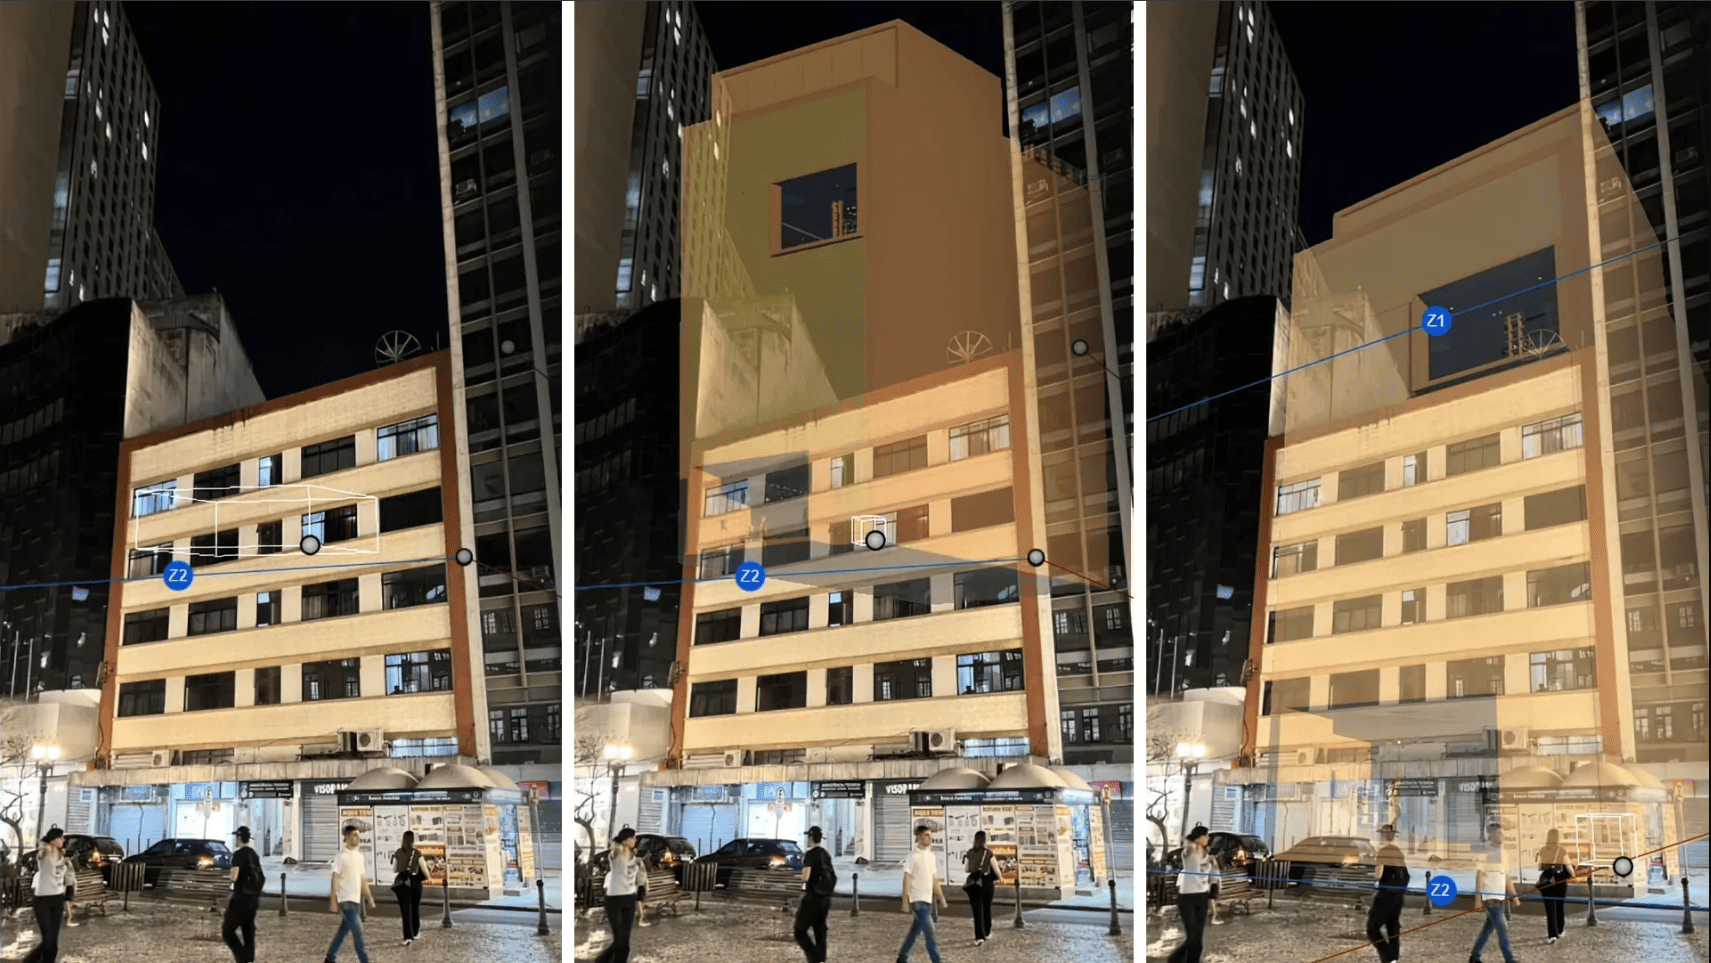
Photo matching in Lumion
Need to show clients exactly how your design will fit into its future surroundings? With the Photo Match effect in Lumion Pro, you can seamlessly place your 3D model into a real-world photo—no need to build a full 3D environment.
With this technique, you can offer clients a lifelike preview of your design in its future environment. All you need is your model and a good site photo, and you’re ready to get started. Let us show you how.
Step 1
Load your background image
Once your model is loaded into Lumion, let’s start by going to photo mode and selecting Photo matching in +FX. Click the Edit icon under the effect name, and then Examples at the top of the settings bar.
You’ll see a selection of templates, all from different camera angles, which you can use as a base for your scene. Try and find the one that best matches the angle of your photo. For this tutorial, we went with the Outer corner, upward angle example.

Now it’s time to load your own background image. You’ll see the option next to the Examples button, so click that and find your saved photo. Your image will appear on top of the example scene.
Step 2
Align your model with the photo
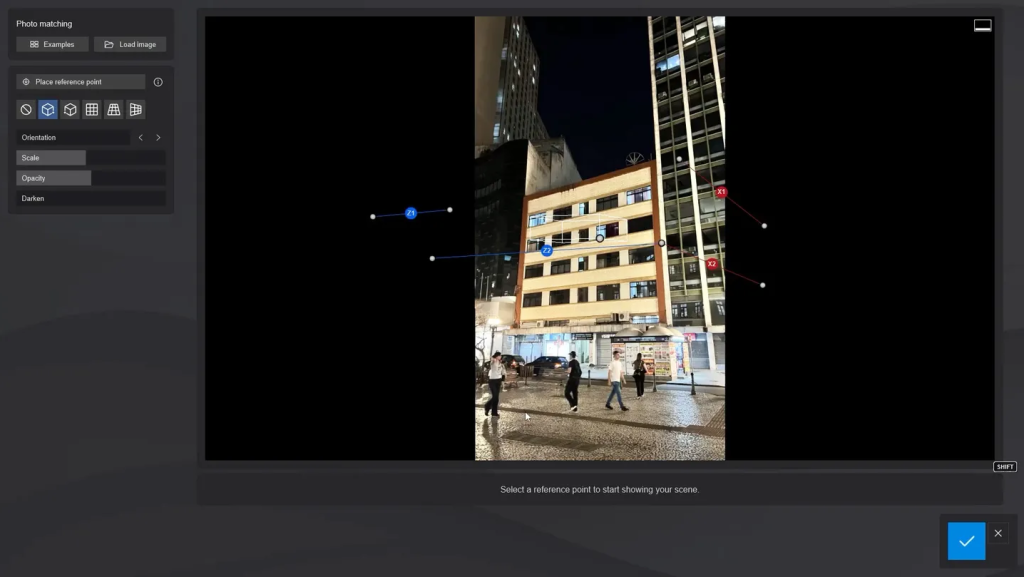
To start matching your model with your photo, hit the Place reference point button. This will take you to your model, where you can choose a reference point to line up.
We recommend starting with the bottom right corner. Click the check, then you’ll be taken back to your image, this time with your model overlaid on top. Drag the bottom right point so it matches up with the corresponding position in the photo.
Decreasing the opacity and scale of your model initially might help you see what’s going on a bit more clearly here. You can also adjust the orientation, so your model better lines up with the surrounding buildings.
You now have to line up the remaining reference points by dragging them into place. Adjust the axes until your model is facing the right direction. Increase the scale until it’s just the right fit, then the opacity to see your model in its new location. Hit the check once you’re done editing to preview your scene.
Troubleshooting tips
Problem: My model looks too big/small compared to the surroundings.
Fix: Adjust the scale slider gradually and compare it to known elements in the photo, such as doors or windows.
Problem: The perspective doesn’t match perfectly.
Fix: Try repositioning your reference points or fine-tuning the camera orientation to better align with the vanishing point of the background image.
Step 3
Render and fine-tune your scene
It’s time to reveal the final result. Render your image to see the whole scene come together.
In some cases, your image may require some post-production tweaks to ensure your building fits snugly into its context. Here, an alpha map was exported to assist in removing the excess.
And there you have it—a seamless blend of your design and reality, offering a clear window into its future.